




Automate Marketing Initiatives with Salesforce Marketing Cloud Learn More

Build Easy to Test Programs with Redux

Redux provides a great developer experience, with large ecosystem of add-ons to fit your requirements. This article contains everything you need to know about Redux. We will go from the concepts to practical examples. By the end of this article, you will be able to build a counter-program to understand how to use redux in react project. 


The program we will make is basically a simple increment and decrement counter program in React that you will see on many ecommerce websites like Amazon, Flipkart, and Myntra, for increment and decrement quantity of the product you want to purchase from these websites. 

Build a Single Global Store for Your Program with Redux

Redux is an application state container tool allowing you to establish a single global store for your program. And that one store can be accessed by all components. 

It might be tough to transfer props and state to child and sibling components in a react application, so redux was created to allow us to pass data through any component using redux. 

The React Redux library is not React-specific only . It’s a library that may be used in conjunction with any other library or framework, including Angular, Vue, and plain JavaScript. 

Understand State flow

State management is a way to present the data you use in your application in the form of data structure. Therefore, it will be easier to exchange this data between components. It facilitates communication between the different components and lets them know about any updated data in an easy way. 


In React, there are many useful libraries for state management scenario: Redux, Recoil, context Api etc. 

Redux provides one single store that you can store a large amount of data. 

Redux Practical Example

This app allows you to increase or decrease the value of a state with the help of redux in your react application. 

You can use this logic in your any ecommerce react project to increase or decrease product quantity. I had used it in a react project. 

Installation in Application

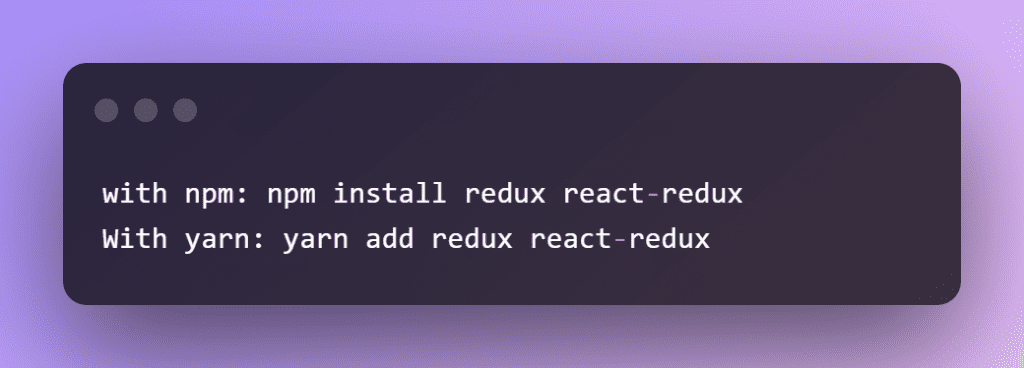
After creating your first react application with react app do the following steps to install redux. 

image 14 1

Remember that both redux and react-redux must be installed.  

We can create the store with redux, and we can use redux in a React app with react-redux. 

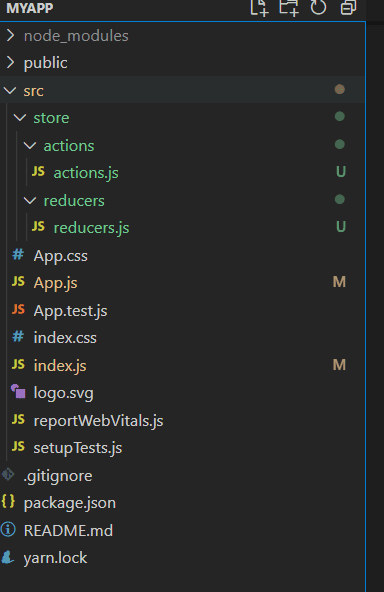
Create a folder called Store after the installation is complete. Create two new folders under this one, one named actions and the other named reducers. 

 You can name the folders whatever you wish, but this is the recommended method. We should always name folders and files according to the action we are about to conduct, so that any new coder can comprehend them. 

image 13 1

Coding

In order to work with redux, there are few steps to go through which are applicable no matter which type of application you are building. You can go through these steps: 


1- Understand actions 

2-Understand reducers 

3-Understand store 

4- Dispatching the actions 


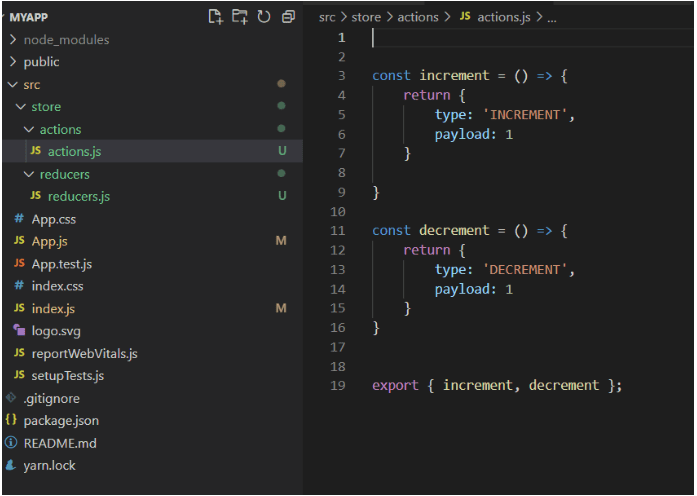
Actions

Action is merely a function that returns a two-attribute object: – 

  1. Type: a string that describes the action you’re performing.  
  1. Payload: – Payload is the data you’ll use to update your state. 

In our scenario, we’ll need two actions: one to increase the status, and another to decrease it. 

Recommendations suggest to write action using capital letters. 

image 15 1

Reducer 


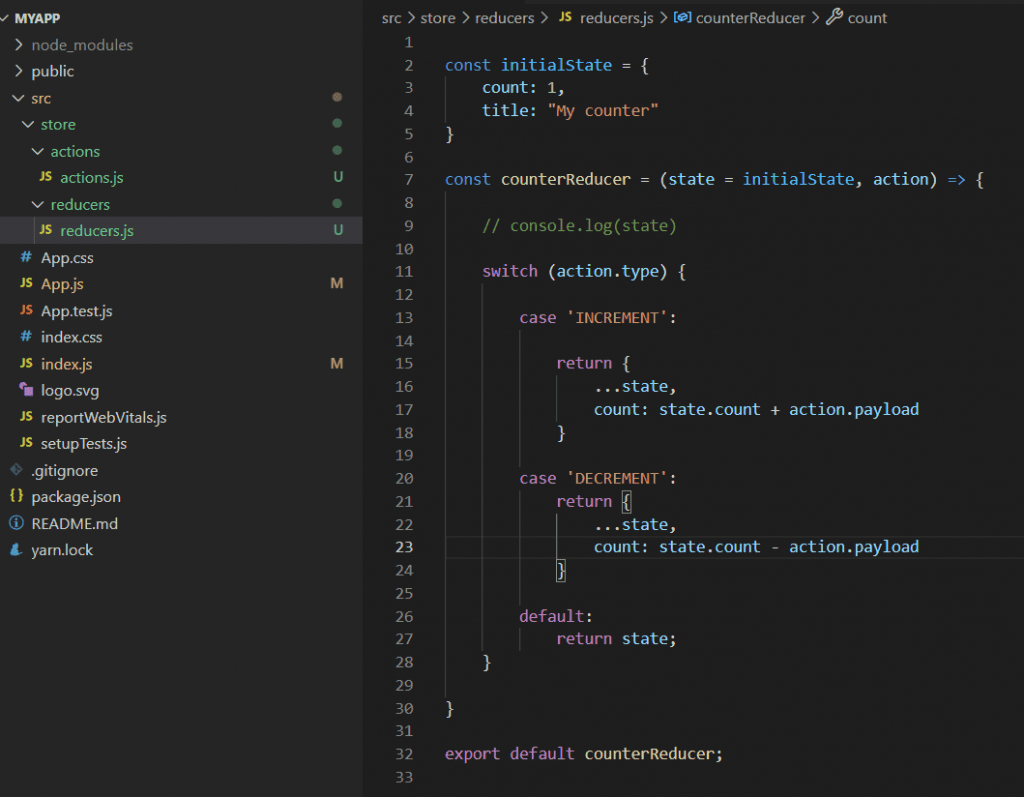
The reducer is the function that performs the incrementing or decrementing operation. It requires two inputs. The first parameter specifies the state to be updated, while the second specifies the action to be performed on the state in order to change it. 

It’s vital to note that whatever you supply as the reducer’s first parameter will be recognized by redux as the state and will be automatically recorded in the store. 

image 16 1

We created an object initialState and used it to initialize the state parameter. 


The reducer will return to the state with the same fields unmodified, except for the count field, which will be added to the value of the payload, depending on the action type ‘INCREMENT’ or ‘DECREMENT.’ 

Store 


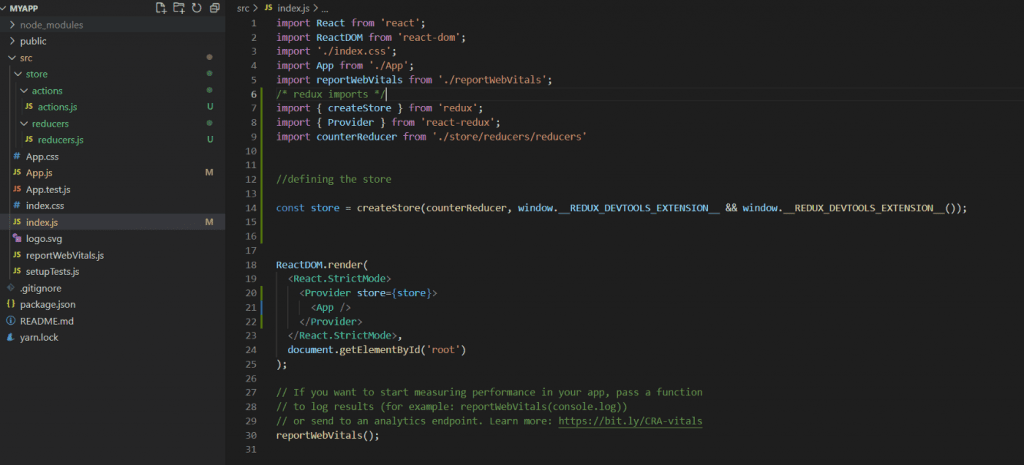
We need to create the store now that we have our actions and reducer ready. Do the following in the index.js file. 

image 17 1

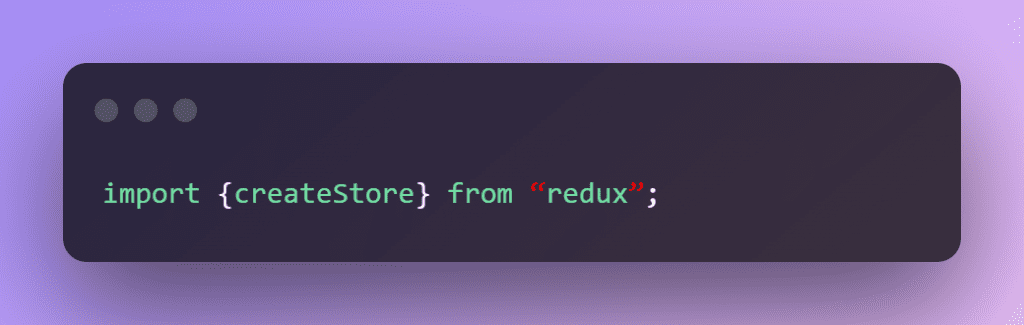
To create the store, we utilize the createStore method from redux, which looks like this:

image 18 1

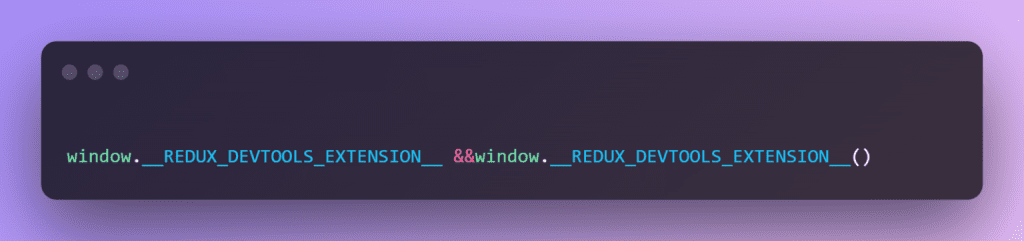
We use the Redux dev tools extension to better visualize the state that is being updated. Simply add it to your browser and then, alongside the reducer, add the following to your createStore method.

image 19 1536x361 1

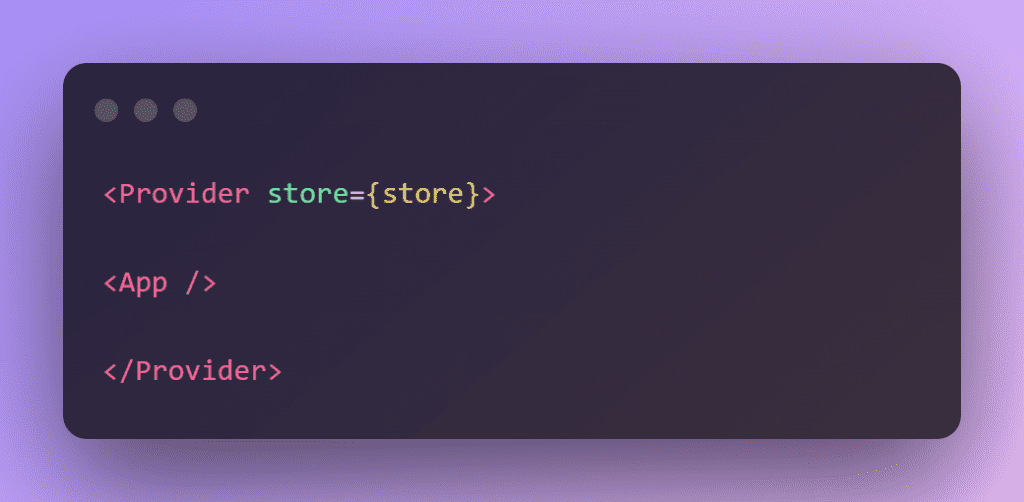
We use a Provider that we import from react-redux to make the store accessible to all components. Supplier passes the store to our app as a prop. All of the components will be able to access the data. 

image 20 1

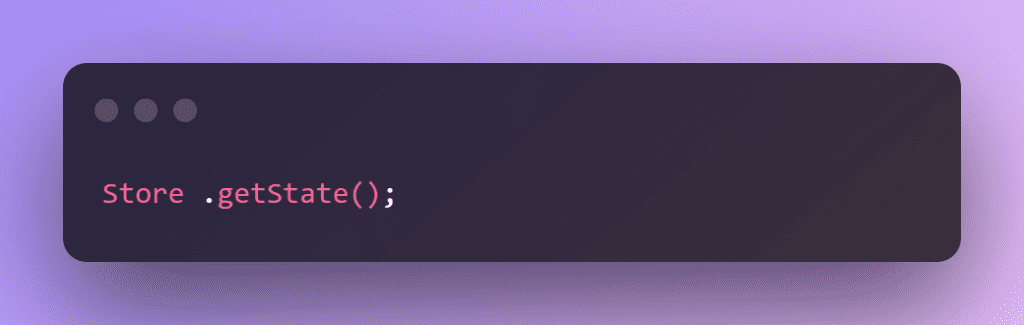
 If we want to get any data from redux store, or want to get redux state we can get it by: –  

image 21 1

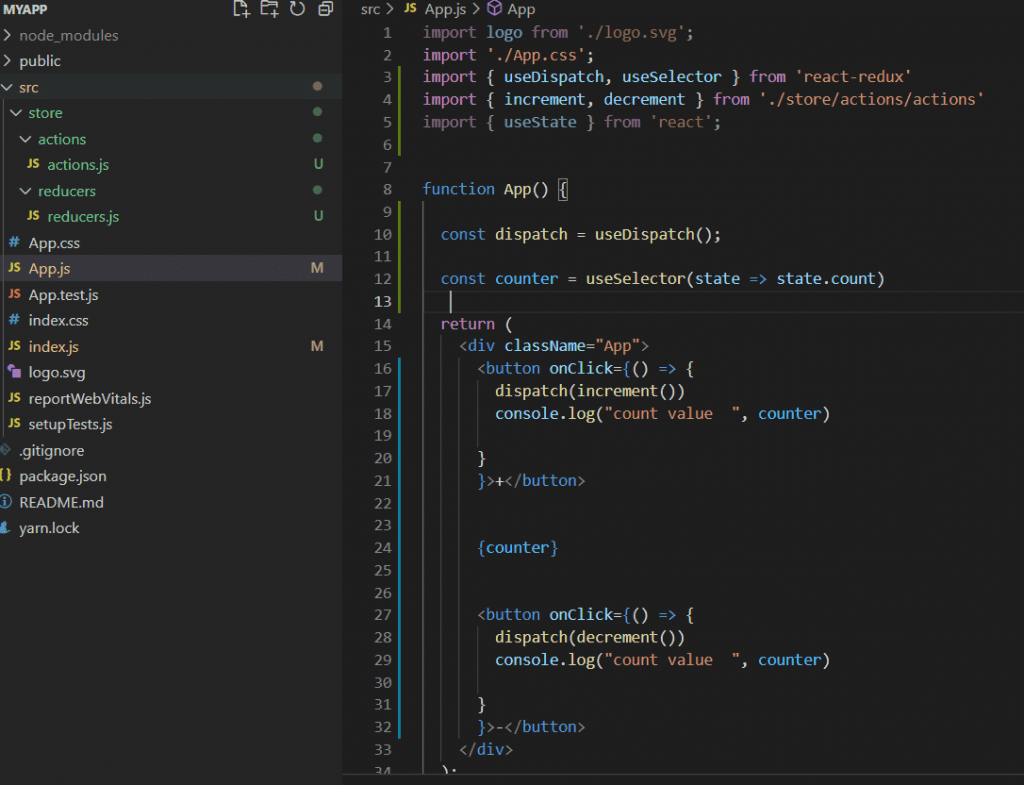
Defining the Dispatcher

image 22 1

UseDispatch hook defines the dispatcher. The dispatcher is a function that takes an action as a parameter and instructs the reducer to do it.  

When we press the + button, the dispatcher sends the increment action to the reducer, who then performs it on the state.  

When we press the button-, the dispatcher sends the decrement action to the reducer, who then performs it on the state.  

However, how can we get the state from this file? 


Because of the store, we can utilize the useSelector hook, which takes the state that we saved in the store as an argument by default.  

Then we may utilize it to go to our state from any component. 

React State Management Flow 
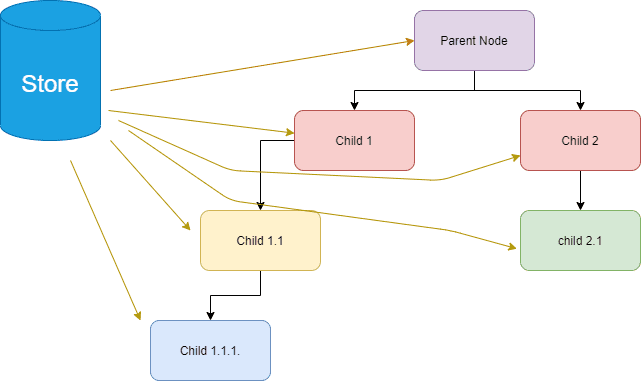
Below diagram will show you a basic flow of react redux store to any other component from parent to child component and their sibling component. 

There is only one store in which we have only one single state and data is passed through any component from parent to child and so on smoothly without any hurdle. 

image 23 1

A place for big ideas.

Reimagine organizational performance while delivering a delightful experience through optimized operations.

Conclusion

As we have seen that Redux is very easy to use and time saving. Redux is not necessary for the react application but if we use redux is our application it provides a better user experience as everything goes faster and smoother. And if you build a large and complex application then it is a very powerful tool to manage your application states.   


I personally use redux in my two react applications and trust me it is a very helpful tool for state management. 

Top Stories

The Complete Guide to Odoo in 2026
The Complete Guide to Odoo in 2026: Implementation, Customisation, Integration, Migration and Cost
What Odoo actually is Odoo is a suite of business applications built on a shared database — CRM, sales, inventory, manufacturing, accounting, HR, website, point of sale, and several dozen more. The applications are modular. You switch on the ones you need and leave the rest off. The architectural point
How to Connect WooCommerce to Odoo
How to Connect WooCommerce to Odoo — Complete Setup Guide
Connecting WooCommerce to Odoo does not require a developer, a middleware tool, or weeks of implementation. The Zehntech Odoo WooCommerce Connector gives you real-time bi-directional sync between your WooCommerce store and your Odoo backend — set up in under 15 minutes. This guide is for Odoo administrators, eCommerce operations managers,
How to Connect Odoo to ShipStation — Step by Step Setup Guide
How to Connect Odoo to ShipStation A Step-by-Step Setup Guide
This guide walks you through connecting Odoo to ShipStation using the Zehntech Odoo ShipStation Connector — from generating your API credentials in ShipStation to your first automated order push and tracking import. Most setups take under 10 minutes. Prerequisites Before you begin: Odoo version: v17, v18 or v19 (Online, Odoo.sh
AI Agents Are Transforming Odoo ERP Operations in 2026
How AI Agents Are Transforming Odoo ERP Operations in 2026
Most ERP systems already hold the information needed to make better decisions. The problem is the work between the data and the decision: opening several modules, filtering records, exporting spreadsheets, comparing numbers and then updating Odoo manually. AI agents are beginning to remove that gap. Unlike a chatbot that only
Connect Odoo & Shopify Automatically in 2026
How to Connect Odoo and Shopify Automatically (2026 Guide)
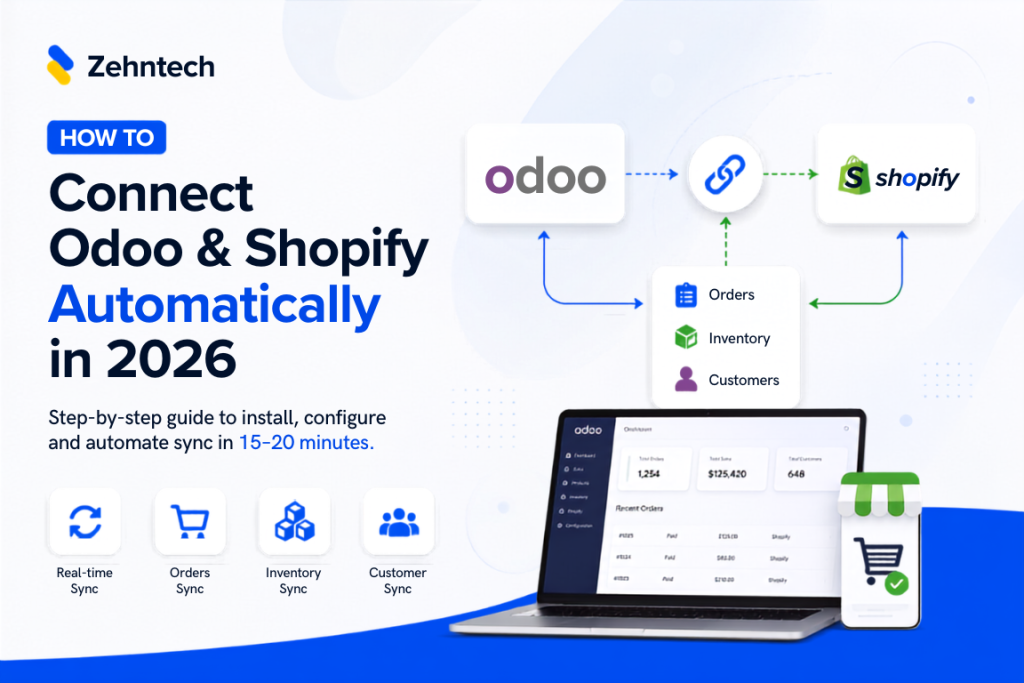
If you're running Shopify for your storefront and Odoo for everything behind it — inventory, accounting, fulfillment — you already know the two don't talk to each other out of the box. This guide walks through exactly how to connect them so orders, stock, and customer data sync automatically, with
Odoo Hubspot Connector
How to connect hubSpot to odoo a step-by-step setup guide
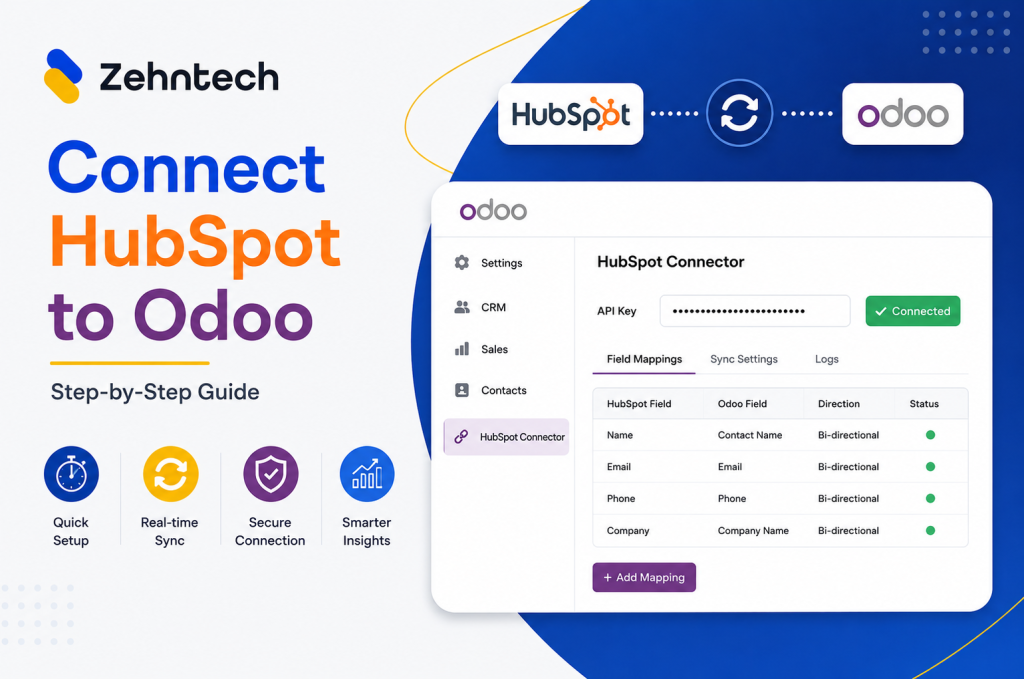
This guide walks you through connecting HubSpot to Odoo using the Zehntech Odoo HubSpot Connector from generating your API key in HubSpot to your first live sync. Most teams complete this in under 10 minutes. Prerequisites Before you begin: Odoo version: v16, v17, v18 or v19 (Online, Odoo.sh or On-Premise)

          Success!!

          Keep an eye on your inbox for the PDF, it's on its way!

          If you don't see it in your inbox, don't forget to give your junk folder a quick peek. Just in case.


              You have successfully subscribed to the newsletter

              There was an error while trying to send your request. Please try again.

              Zehntech will use the information you provide on this form to be in touch with you and to provide updates and marketing.