



Automate Marketing Initiatives with Salesforce Marketing Cloud Learn More

Creating SPFx Web Parts: Key Tip

Sharepoint Framework

The SharePoint Framework (SPFx) is a web page and web part-based model. It offers complete assistance for client-aspect SharePoint development,  clean integration with SharePoint records,  and extending Microsoft groups. 

Further, we’ll learn how to make a web part with SharePoint Framework and how to create our first SPFx web part.

Setting Up SPFX Development Environment

Install:  
1.node js 
2. Install any code editor that supports client-side development to create webpart: like Visual studio code
3. yeoman and gulp: npm install -g yo gulp 
4. Yeoman SharePoint generator: – npm install -g @microsoft/generator-sharepoint 

To get the node, gulp, and yeoman versions used: –  npm list -g –depth=0 

Screenshot 418 1024x193 1

Create the First Web Part

Web components are UI blocks that can be shown on a SharePoint page. 

By following the guidelines, let’s create a new  SPFx web part project.

  • Open the command prompt and
  • Create the folder where you want to create your webpart solution: md demoWebpart 
  • Enter in the folder: cd demoWebpart 

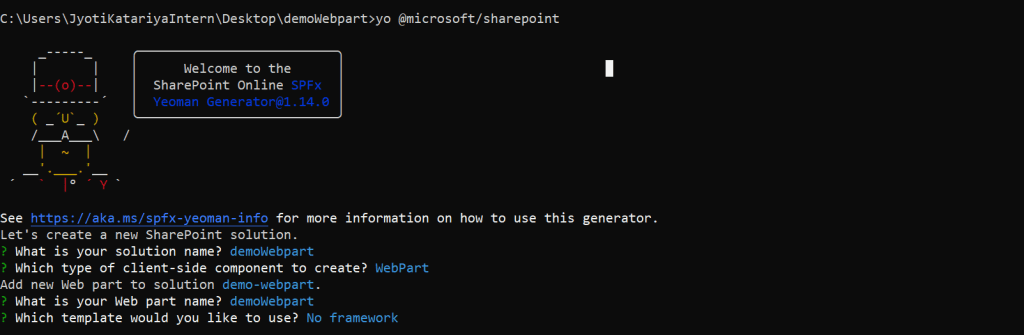
Further, to create a new solution on the present location, use the following command in the terminal yo @microsoft/sharepoint

After that generator will ask for the following user input: 

  • What is your solution name? (spfx-webpart): demowebpart 
  • Which type of client-side component to create?: webpart 
  • What is your Web part name?: demoWebpart 
  • Which template would you like to use: noframework 
Screenshot 420 1024x335 1

Following this procedure, your demo Web Part will be created. Further, we can test the Web Part on a workbench after creating the solution.

Use gulp serve to test the web part on the workbench.

To deploy the build: 
gulp bundle –ship 
gulp package-solution –ship 

A place for big ideas.

Reimagine organizational performance while delivering a delightful experience through optimized operations.

Web Part Using React Framework:

React components contain many functionalities and provides ability to receive properties. Components can transfer information among each other through properties. As a result, in this way you can control which view of web part will be display at any specific time slot.

For instance, the multiple views are built individually to make the programming and maintenance easier. Further, this also makes it easy for a group of developers to work on the same web part at the same time. Meanwhile, splitting the multiple views into independent React components, on the other hand, allows switching between them much easier. 

Creating Web Part Using React Framework:

yo @microsoft/sharepoint

What is your solution name? (spfx-webpart): webpartWithReact 


Which type of client-side component to create?: webpart 


What is your Web part name?: webpartWithReact 


Which template would you like to use: React

After this, your web part will be created.

In webpart, three files are created in src/webpart/component 


WebpartWithReactProp.ts: in this, we declare the properties 


WebpartWithReact.tsx: in this, we can use properties that are declared in WebpartWithReactProp.ts file 


WebpartWithReact.module.scss: write the CSS


Therefore, SharePoint web parts provide functionality for web developers to create an extremely efficient and user-friendly solution. 

Further, Web parts can display lists and libraries, data from external data sources, and content from other sites.


 To sum up, with versatility and inter-combinability SharePoint web part is an immensely powerful means to build up the content.

Top Stories

How to Connect WooCommerce to Odoo
How to Connect WooCommerce to Odoo — Complete Setup Guide
Connecting WooCommerce to Odoo does not require a developer, a middleware tool, or weeks of implementation. The Zehntech Odoo WooCommerce Connector gives you real-time bi-directional sync between your WooCommerce store and your Odoo backend — set up in under 15 minutes. This guide is for Odoo administrators, eCommerce operations managers,
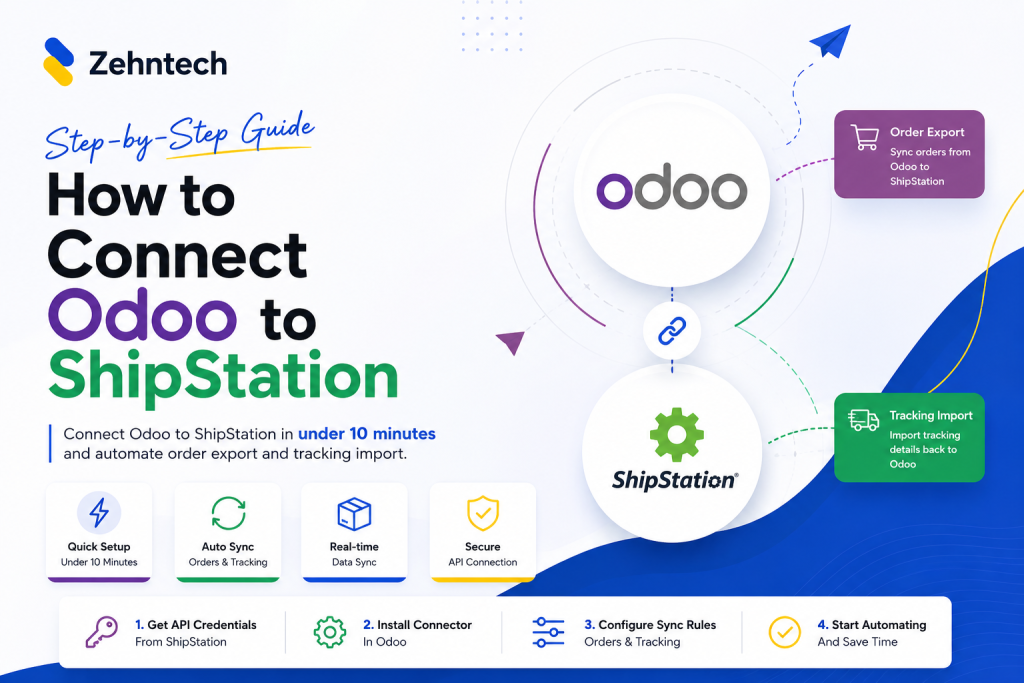
How to Connect Odoo to ShipStation — Step by Step Setup Guide
How to Connect Odoo to ShipStation A Step-by-Step Setup Guide
This guide walks you through connecting Odoo to ShipStation using the Zehntech Odoo ShipStation Connector — from generating your API credentials in ShipStation to your first automated order push and tracking import. Most setups take under 10 minutes. Prerequisites Before you begin: Odoo version: v17, v18 or v19 (Online, Odoo.sh
AI Agents Are Transforming Odoo ERP Operations in 2026
How AI Agents Are Transforming Odoo ERP Operations in 2026
Most ERP systems already hold the information needed to make better decisions. The problem is the work between the data and the decision: opening several modules, filtering records, exporting spreadsheets, comparing numbers and then updating Odoo manually. AI agents are beginning to remove that gap. Unlike a chatbot that only
Connect Odoo & Shopify Automatically in 2026
How to Connect Odoo and Shopify Automatically (2026 Guide)
If you're running Shopify for your storefront and Odoo for everything behind it — inventory, accounting, fulfillment — you already know the two don't talk to each other out of the box. This guide walks through exactly how to connect them so orders, stock, and customer data sync automatically, with
Odoo Hubspot Connector
How to connect hubSpot to odoo a step-by-step setup guide
This guide walks you through connecting HubSpot to Odoo using the Zehntech Odoo HubSpot Connector from generating your API key in HubSpot to your first live sync. Most teams complete this in under 10 minutes. Prerequisites Before you begin: Odoo version: v16, v17, v18 or v19 (Online, Odoo.sh or On-Premise)
Odoo AI: How AI Agents Are Automating Business Operations in 2026
Odoo+AI: How AI Agents Are Automating Business Operations in 2026
Your Odoo system knows everything about your business. It knows which products are below reorder level right now. It knows which purchase orders are overdue. It knows which outlets sold below target yesterday and which customers are approaching their credit limit. Your team does not know any of this until

          Success!!

          Keep an eye on your inbox for the PDF, it's on its way!

          If you don't see it in your inbox, don't forget to give your junk folder a quick peek. Just in case.


              You have successfully subscribed to the newsletter

              There was an error while trying to send your request. Please try again.

              Zehntech will use the information you provide on this form to be in touch with you and to provide updates and marketing.