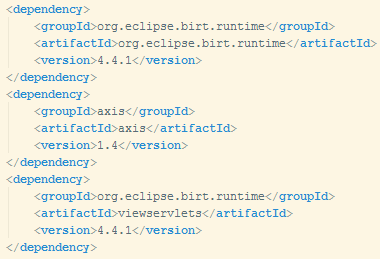
As the dependencies are created, there is the information required to be filled in and configured with the deployment of BIRT server. There is a web.xml file where all information has to be added and configured.
Below is the list of commands, codes, and information that is required.
1. Setting the location for the working folder in BIRT, that is, the folder that shall carry all the reports.
2. Setting flag value to determine the location of the reports. Generally, the reports are available only from the working directory and the default flag value is TRUE.
3. Specifying the parameters to set up work with the URL addresses of the reports. There are several values for this which depend on the nature of the report URL.
4. Defining configuration file location.
5. Defining the areas where the print function is available, whether only on the client-side or on the server-side as well. By default the function is ON.
6. Setting flag to determine if compelling optimization for the browser in HTML is enabled or not. The default value is TRUE.
7. Specifying Class names for the reports.
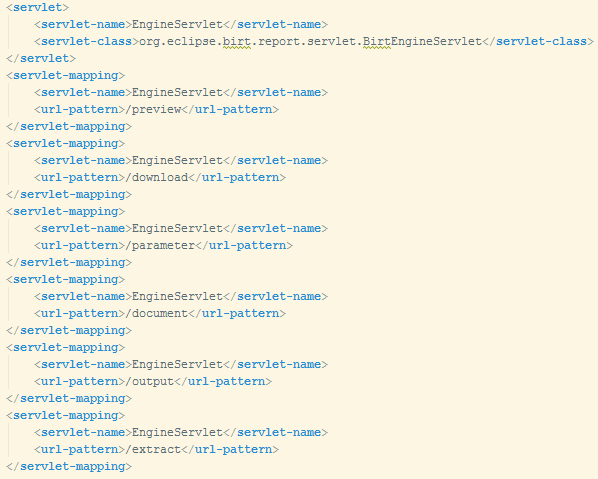
8. Setting Servelet Context and HTTPSessionListener.

9. Registering and Configuring ViewerServelet and Engine Servelet.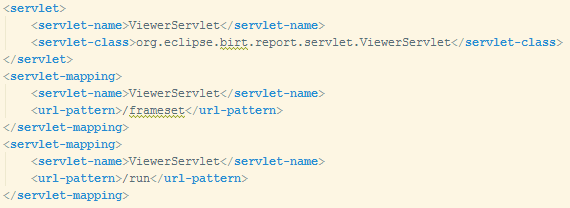
Once done with all these things, you are finished with the configurations. All you have to do now is connect the program files and add a report template to the project. With that, you shall be finished with the BIRT integration.
For connecting the program files, you have to start with downloading certain archives which are namely webcontent.zip and programfiles.zip.
After this download, you can start creating your individual folders and then create a tlds directory. After that, you move on to putting files from the programfiles.zip archive in the web application as follows:
birt.tld into /webapp/WEB-INF/tlds
erver-config.wsdd files and viewer.properties into /webapp/WEB-INF
Once done, this is how the content in the folders and files shall appear: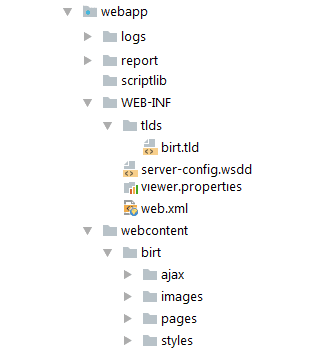
Now, BIRT components are added and integrated into the web application so that the reports start displaying. You just have to put the report templates into the /webapp/report folder.
Once done, it will look like this: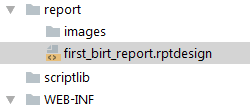
After this, you can also put a link to your report in the web application and the entire report management becomes very easy.
There is yet one last thing you ought to do, that is, run the application. Do it with the following code and command.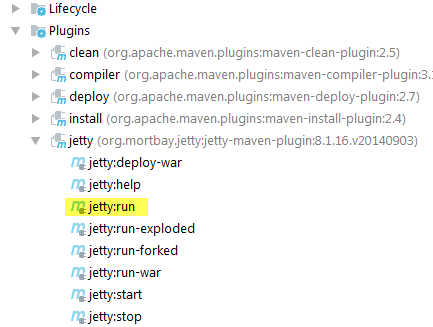
After you run the application, your report is available to you over it.